Mastering Copilot Studio: Publish Copilots in Copilot Studio and Analyzing Performance
In the rapidly evolving world of technology, understanding how to effectively publish and manage copilots in Microsoft Copilot Studio is essential, especially for those new to the field. This guide will walk you through the entire process, from initial setup to performance analysis, ensuring you can confidently deploy and optimize your copilots.
The Basics: How to Get Started with Copilot Studio?
If you’re new to Copilot Studio, getting started couldn’t be easier. Here is a step-by-step guide:
- Setting Up: First, ensure you have a Microsoft account. You can access Copilot Studio through the Microsoft 365 family of applications. Installation is straightforward, often integrated within applications like Word, Excel, or PowerPoint.
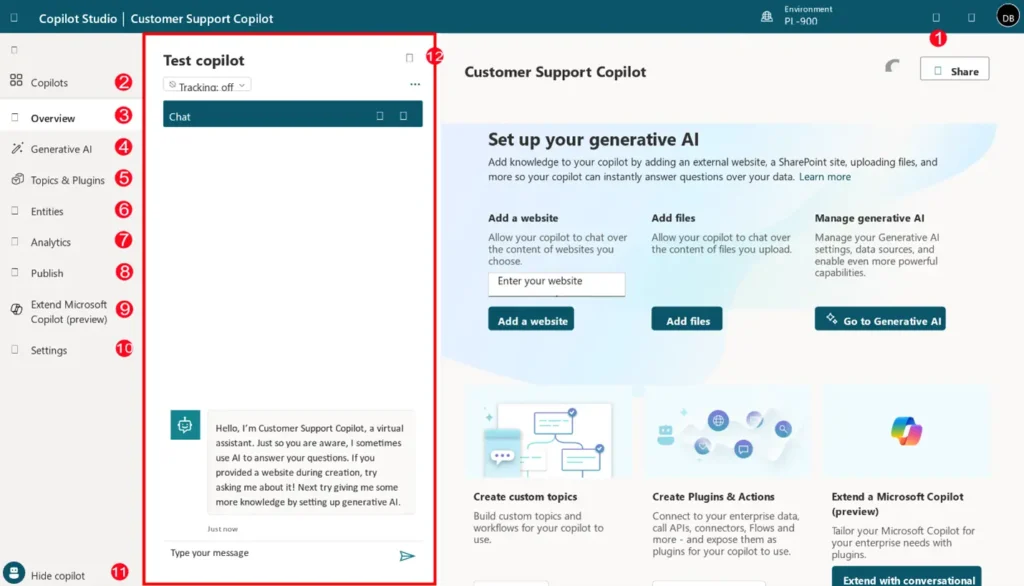
- Navigating the Interface: The intuitive interface makes it easy to find features with user-friendly dashboards and help functions. Familiarize yourself with the menu and options available in the studio.
- Initial Configuration: Customize your preferences within the Studio to better align with your content creation objectives. You can tweak settings such as input style, output choices, and more.
- Explore Tutorials: Microsoft offers guided tutorials to help new users get acquainted with the system. These tutorials often provide step-by-step walkthroughs to complete various tasks.
Setting Up Your Copilot
Before you can publish your copilot, you need to ensure it is properly set up. This involves creating the copilot content and configuring it to meet your organization’s needs.
Steps to Set Up Your Copilot:
- Test Interactions: Use the test panel to simulate user interactions and refine responses.
- Create Content: Develop the copilot’s responses and interactions.
- Configure Settings: Adjust settings to align with your organizational requirements.
Step-by-Step Guide How to Publish Copilots in Copilot Studio
1. Setting Up Your Environment
Before you start, ensure you have the necessary tools and permissions. This includes access to Copilot Studio and any required APIs.
2. Creating Your Copilot
- Define Objectives: Clearly outline what you want your copilot to achieve.
- Design Workflow: Map out the tasks your copilot will handle.
- Develop and Test: Use Copilot Studio’s tools to build and test your copilot.
3. Configuring Security and Authentication
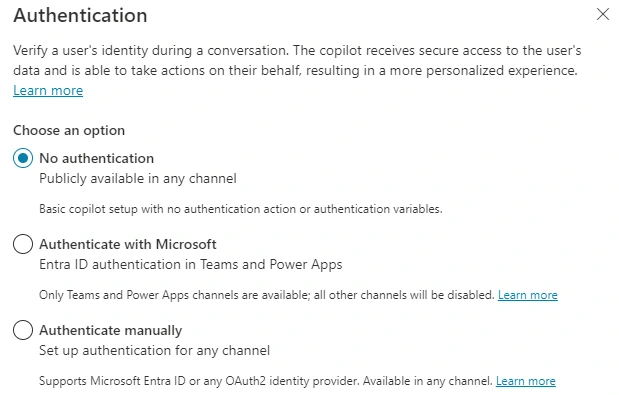
Before publishing your copilot, it’s essential to configure security and authentication settings. This ensures that users can access the data within the copilot and that it can be deployed to the necessary channels later. To configure these settings, navigate to Settings > Security. There are three options for configuring authentication in your copilot:
- No Authentication: No authentication is required; the copilot can be used publicly on any channel.
- Authenticate with Microsoft: Uses Microsoft Entra ID authentication in Teams and Power Apps to authenticate users. The copilot will be available on Teams and Power Apps channels. This is the default setting.
- Authenticate Manually: You can configure either Microsoft Entra ID or OAuth2 authentication. The copilot will be available on any channel.
4. Publish Your Copilot
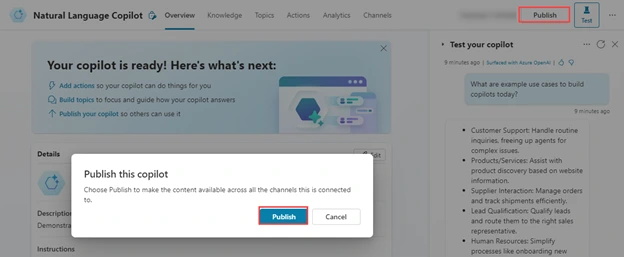
- Review and Finalize: Ensure all components are working correctly.
- Deploy: Use the publishing feature in Copilot Studio to make your copilot available to users.
Sharing and Testing Your Copilot in Microsoft Copilot Studio
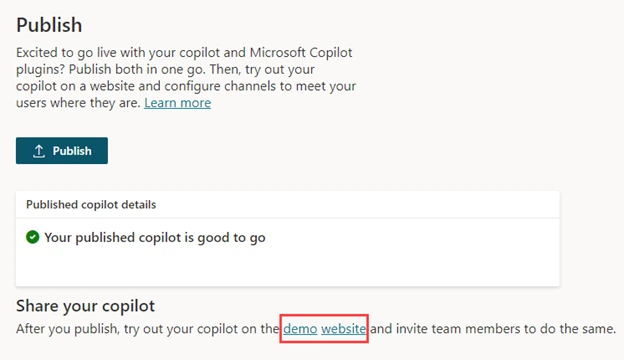
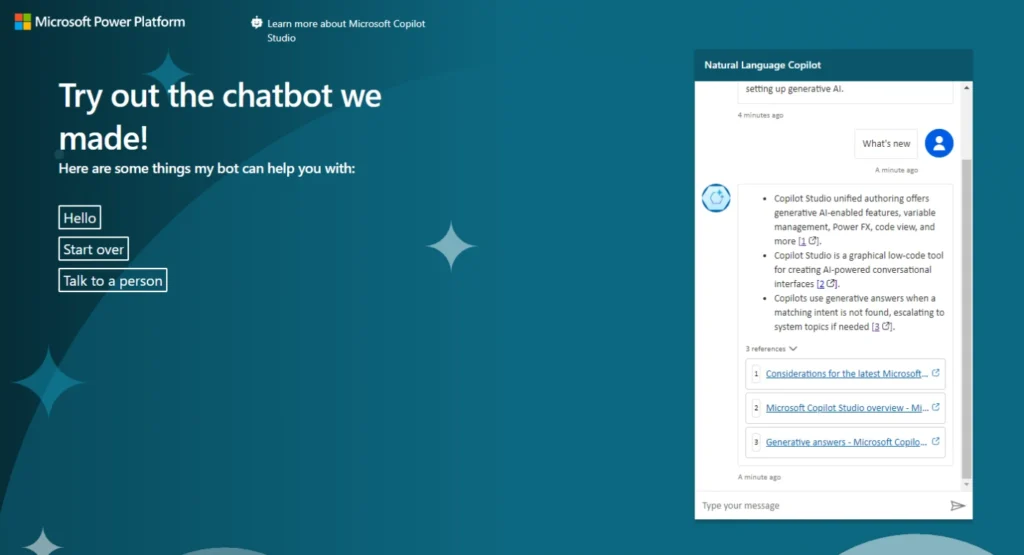
Before deploying your copilot to various channels, it’s beneficial to share it with team members for feedback. This can be done through a demo website.
Steps to Share and Test:

- Share for Collaborative Authoring: Allow team members to edit and refine the copilot.
- Use Demo Website: Provide the demo URL to stakeholders for testing the copilot in a real-world scenario.
Deploying Copilots to Various Channels
Once your copilot is published, you can deploy it across multiple platforms to reach a wider audience.
Channels for Deployment:
- Telephony Channels
- Websites
- Slack
- Line
- GroupMe
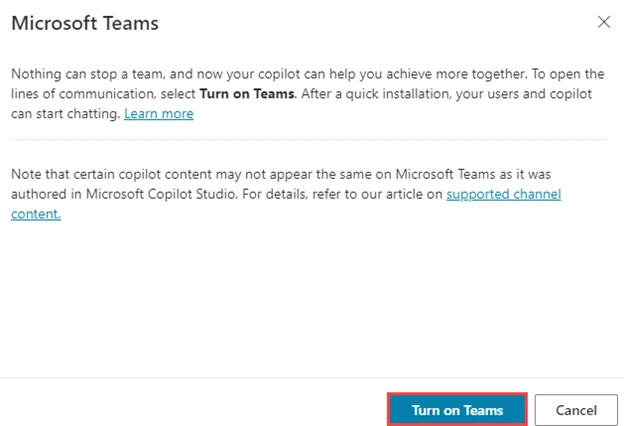
- Microsoft Teams
Analyzing Performance after Copilot Studio Publish
Once your copilot is published, it’s crucial to monitor its performance to ensure it meets your objectives.
Key Metrics to Track
- Usage Statistics: How often is your copilot being used?
- Error Rates: Are there any recurring issues?
- User Feedback: What are users saying about your copilot?
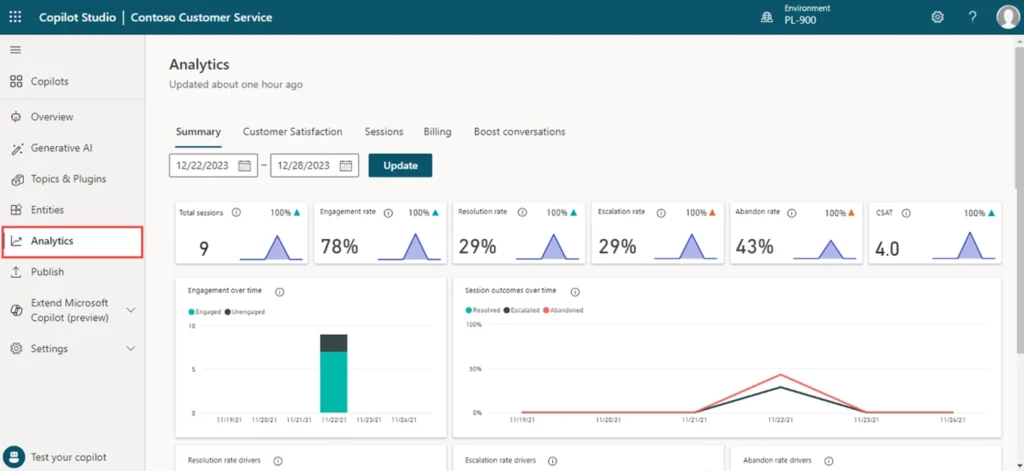
After deployment, it’s important to monitor and analyze the performance of your copilot to ensure it meets user expectations and business goals.
Key Performance Indicators (KPIs):
| KPI | Description |
|---|---|
| Session Volume | Number of sessions handled by the copilot. |
| User Engagement | Effectiveness in engaging users and resolving issues. |
| Escalation Rates | Frequency of escalations to human agents. |
| Abandonment Rates | Instances where users abandon the conversation. |
| Customer Satisfaction | User feedback on the copilot’s performance. |
Tools for Analysis
Copilot Studio provides several built-in tools to help you analyze performance:
- Dashboard: A comprehensive overview of key metrics.
- Reports: Detailed reports on specific aspects of your copilot’s performance.
- Alerts: Notifications for any critical issues.
Best Practices for Optimizing Copilot Performance
- Regular Updates: Keep your copilot updated with the latest features and fixes.
- User Training: Provide resources to help users get the most out of your copilot.
- Feedback Loop: Continuously gather and act on user feedback.
Conclusion
Publishing copilots in Microsoft Copilot Studio is a straightforward process that involves setting up your copilot, configuring security, publishing, sharing for feedback, deploying to various channels, and analyzing performance. By following this guide, even those new to the technology field can effectively manage and optimize their copilots, ensuring they provide valuable interactions for users.
Frequently Asked Questions (FAQs)
What is a copilot in Copilot Studio?
A copilot is an AI-driven assistant designed to help with specific tasks, improving efficiency and accuracy.
How do I publish a copilot?
Follow the steps outlined in the guide above, ensuring you test thoroughly before deployment.
How can I analyze my copilot’s performance?
Use the built-in tools in Copilot Studio, such as the dashboard and reports, to monitor key metrics and gather user feedback.
How do I publish my project using Copilot Studio?
To publish using Copilot Studio, draft your content, select your publishing platform, customize it as required, preview and finalize adjustments, then publish with a simple click.
What features does Copilot Studio offer for publishing?
Copilot provides various features such as AI-driven content suggestions, platform integration, formatting tools, content management, and collaboration capabilities.
Can I use Copilot Studio with other tools?
Yes, Copilot is designed to work seamlessly with other Microsoft products like Word, Excel, PowerPoint, and Teams, enhancing collaborative and individual projects.
How do I troubleshoot publishing errors in Copilot?
Consult the built-in help guides within Copilot or the Microsoft Support Page. Often, ensuring software updates and reviewing tutorial materials resolves most issues.
What are the best practices for using Copilot Studio?
Keep your software updated, utilize templates, undergo regular training, and integrate AI suggestions for efficient content management and creation.
#MSFTAdvocate #AbhishekDhoriya #LearnWithAbhishekDhoriya #DynamixAcademy
References & Read More:
- Copilot Studio Tutorial EP#1: Understanding What is Microsoft Copilot Studio? A Comprehensive Guide for Beginners
- Copilot Studio Tutorial EP#2: How to Add Knowledge to Copilots in Copilot Studio?
- Copilot Studio Tutorial EP#3: How to Create and Manage Topics in Copilot Studio?
- Copilot Studio Tutorial EP#4: What are Copilot Studio Actions? A Comprehensive Guide for Beginners
- Copilot Studio Tutorial EP#5: How to Publish Copilots in Copilot Studio and Analyze Their Performance?
